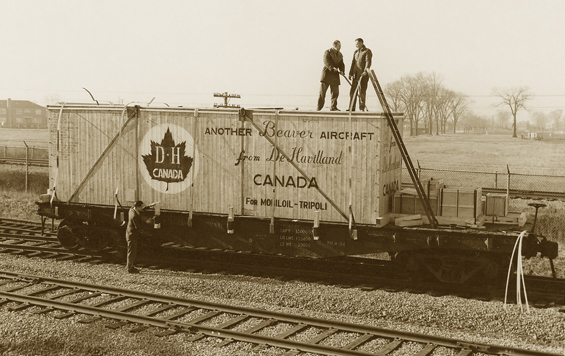
So, there I was, watching a documentary on YouTube. When I noticed an image that was on screen for a brief moment. Nearly spilling my coffee, I quickly realized it was the shipping crate that De Havilland built to ship the Beaver via rail. I found the lettering on the crate quite striking, despite it merely being a box, I was intrigued.
I’ve been a model railroader since I can remember. So much so that I made a business out of it with my father, making laser cut kits and 3D printed items for the model railroader community. I’m also a fan of the Beaver, it’s my personal favorite aircraft of all time. All that to say when I saw the photo of the crate, I immediately wanted to make it!
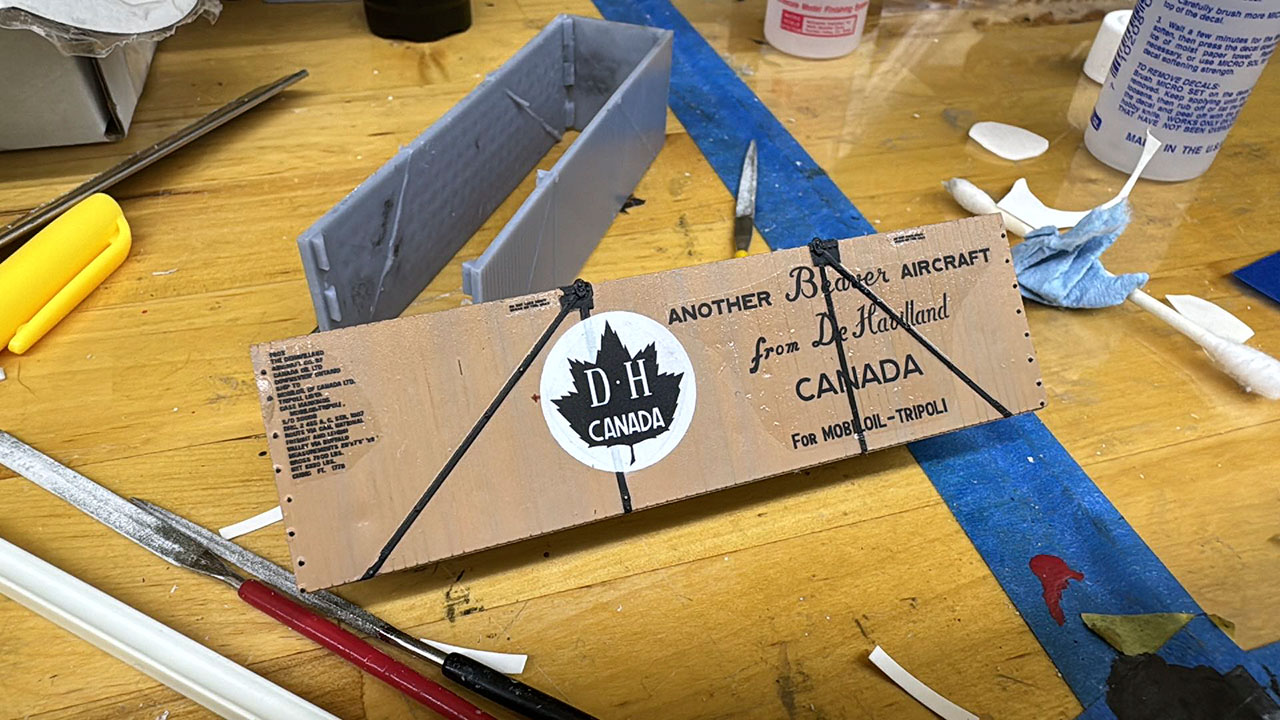
I started looking for the photo online which led me to Neil’s site. I found the photo, but the resolution was far too low to read the stenciling. After I realized trying to guess what all those pixels were, I contacted Neil and he got back to me with high resolution scans of the photo. I traced the lettering off the photo in Adobe Illustrator.
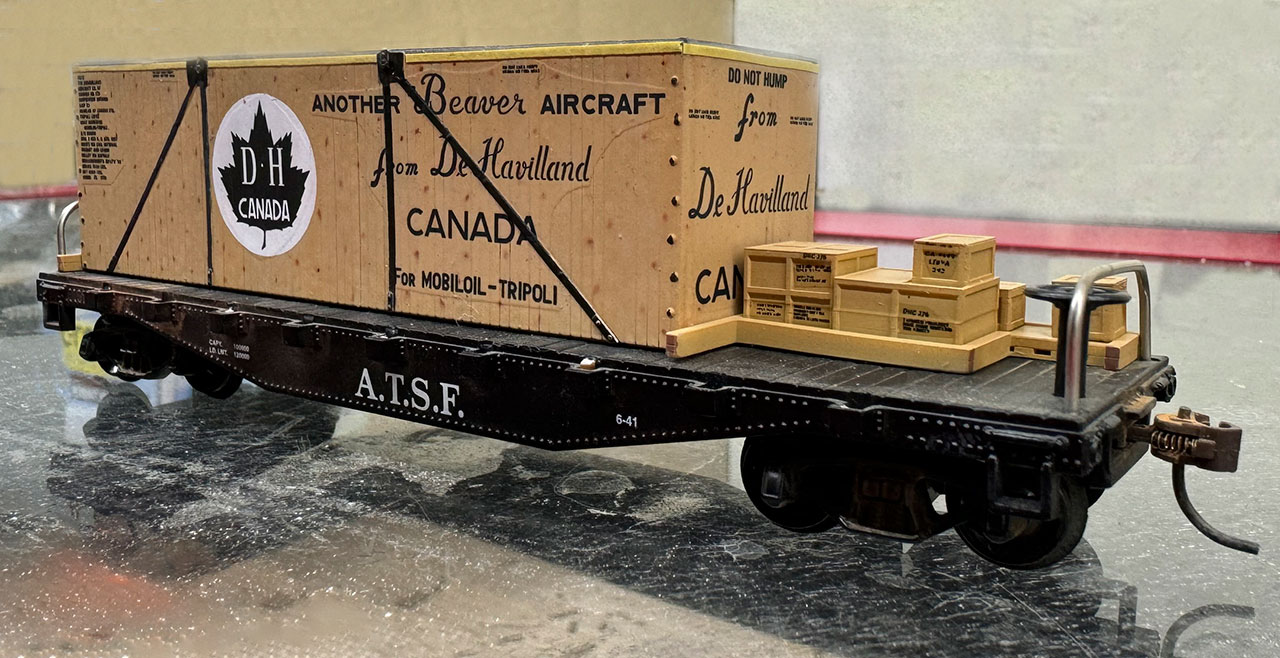
After a couple days I had a set of decals to apply to the crate…but I didn’t have a crate yet! For that I used Blender, a 3D modelling software to draw the crate. Conveniently, the size of the crate was written on the side, so I just put the dimensions in and had a good starting point for the rest of the details.
The crate was printed on a resin printer as four separate pieces, the smaller crates at the front are comprised of five parts. All of them were airbrushed in a tan color and sealed with a clearcoat. Then I finally was able to apply the decals to the model. After they were applied, I sprayed another layer of clear to seal the decals. I used a brown fine tipped marker to create knots in the wood. I wasn’t too happy with the result at first, so I started to remove the ink with Isopropyl Alcohol, but in doing so I discovered that while removing the dots of ink, it took on a realistic appearance to a knot Got lucky on that one!
Once again, I sealed the crate with clear coat, touched up the paint where need be and it was done!
I still need to buy a CN flatcar, which luckily has been produced before. Wouldn’t be the first time I’ve made a flatcar, but I’d rather not add another large project to my never-ending list of personal and business projects. When the car comes in, I’ll strap the crates down to the car as per the photo.
In closing, this was a fantastic project, I very much enjoyed the process and acquaintances made along the way.
Thanks,
Mike